Friday, May 9, 2014

Heavenly Mother's Day 2014

This blog has moved to a new & improved location!  Please visit this page at the new location by clicking here.


Some of us have mothers who have passed on & Mother's Day can be a sad day.  However, we can hopefully put a smile on someone else's day by "adopting" them. After my aunt passed away several years ago, my cousin sent a Mother's Day card to my mother every year.  After my mother passed away two years ago, I have carried on the tradition by sending a Mother's day card to my mother's friend of over 30 years, Kay.  My mother & Kay took several cruises together, played bridge together for many years & Kay visited my mother often, when she was in the hospital.  Kay never had children, so it seemed natural for me to "adopt" her for Mother's Day.

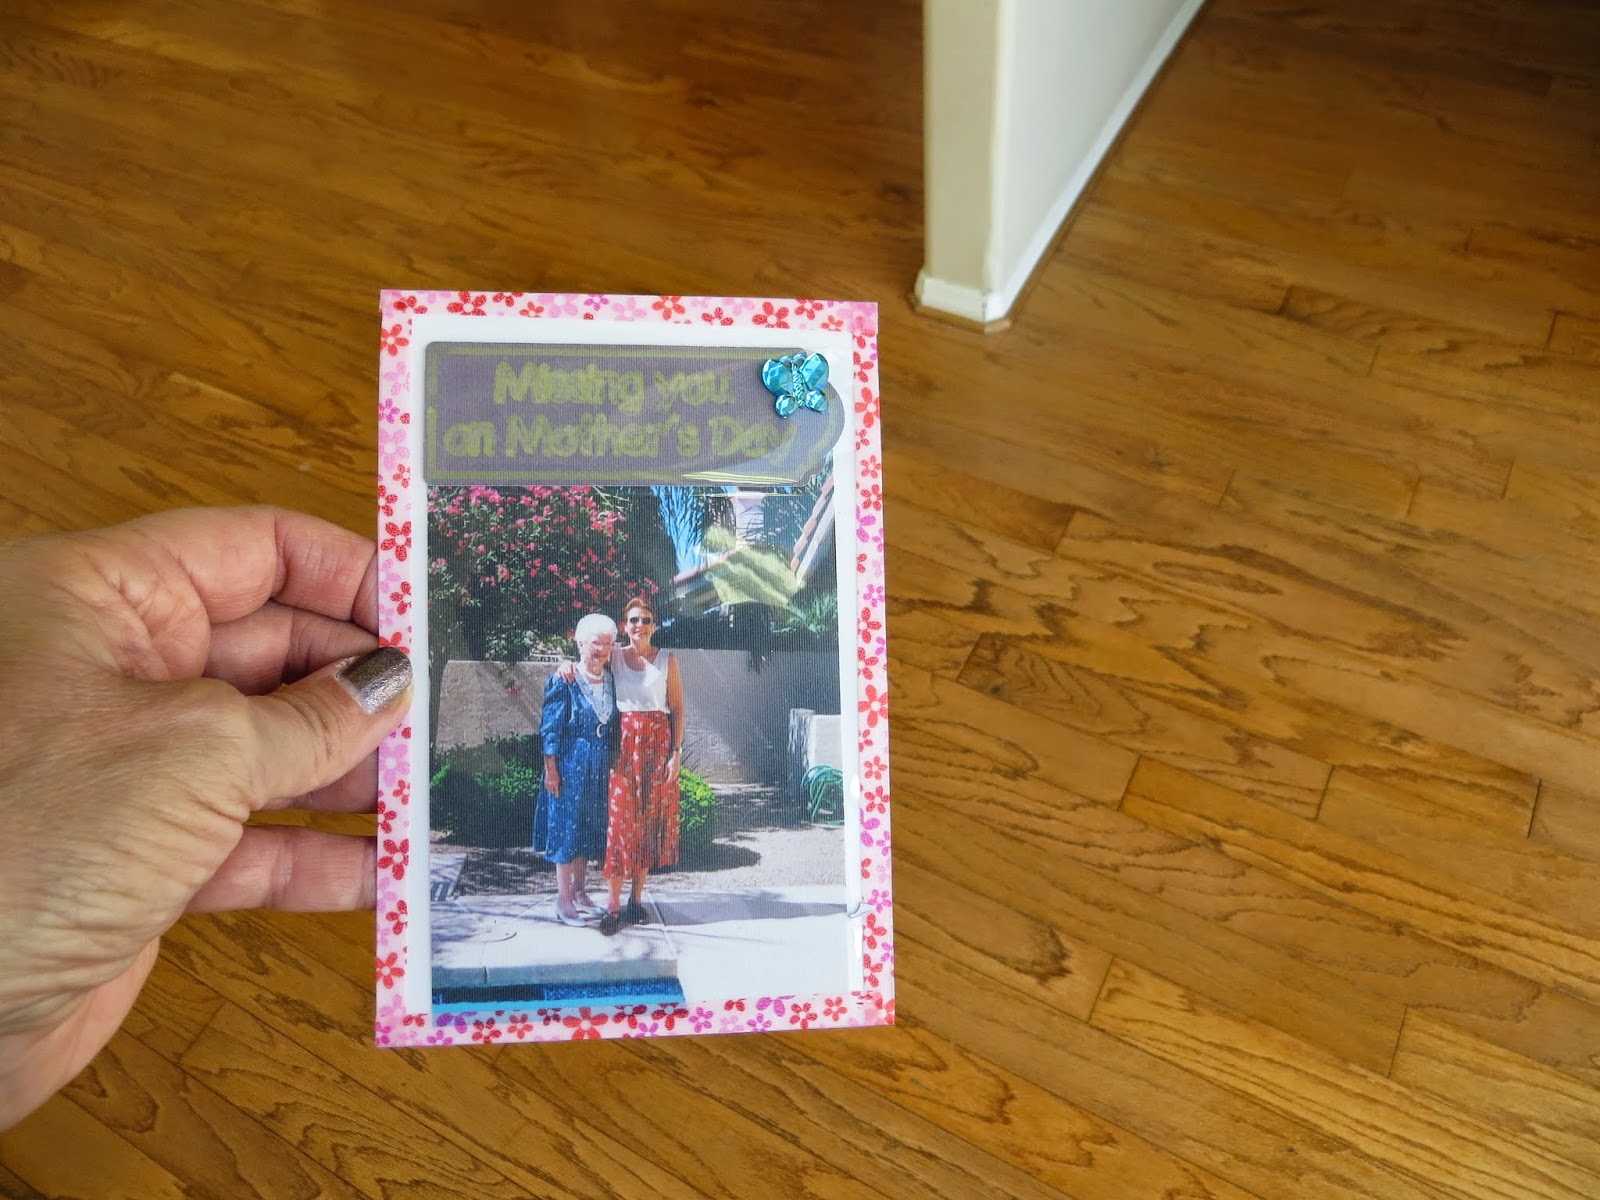
For this years card, I used the CTMH Skylark paper, teal shimmer trim & Lagoon ink. Other items used:


  • butterfly on the front - Martha Stewart
  • Gold embellishment - Embossmints foil stickers (from HSN)
  • light blue dragonfly paper (old paper pack) die cut with...
  • Anna Griffin die cut
  • inside - CTMH teal shimmer tape (LOVE this stuff!)
  • inside - label from Skylark paper was embossed with an embossing folder from The Paper Studio then...
  • ...distressed on the edges with Zutter Distrezz-It-All then...
  • ...inked on the edges with CTMH Lagoon ink pad

The verse on the inside reads:

Many people will walk in and out of your life. 
But only true friends will leave footprints on your heart.
--- Eleanor Roosevelt

Happy Mother's Day to my & my mother's friend!


Additionally, I often make single page cards to hang on the flowers at the cemetery.  This one didn't turn out as nice as I had hoped, but it will do.  I used my Cricut Explore to make the label, printed out a photo of my mother & me, laminated them, then added a butterfly embellishment from a pack I got at the dollar store.  For some reason, the heat lamination didn't seal all the edges.  So I wrapped some washi tape over the edges.


So for those of you who will be with your mothers on Sunday, have a wonderful Mother's Day!.

Tuesday, October 29, 2013

Halloween cards 2013

This blog has moved to a new & improved location!  Please visit this page at the new location by clicking here.


I made two of these.  One for one of my sisters & one for my sister-in-law.

The "outer" paper is from Spooksville by The Paper Studio.

The "inner" paper is digital - from Harvest Moon Halloween Mega Kit (Jessica Sprague).  But I "lightened" it by only printing it at 38%.  The bat on the inside is also from the Harvest Moon Halloween kit.  

The font is Dracula.

The ghost on the front is from Cricut's A Frightful Affair cartridge.  I cut it from white cardstock, sprayed it with Perfect Pearls & then drew in the eyes & mouth.  Spraying with Perfect Pearls caused the ghost to curl a bit, so  I took advantage of this & applied it with pop dots.  This not only gave dimension from the pop dots, but the curled ghost looked pretty neat, too!  Finished off with some washi tape & a small bow. 


Sunday, October 6, 2013

A few cards

This blog has moved to a new & improved location!  Please visit this page at the new location by clicking here.


Since I'm so behind on posting, I'm combining a few in this post.

First up is a birthday card for my niece.  I wanted something bright & cheerful.  Although cutting text for quarterfold cards (since they are so small) is usually a fruitless endeavor IMO, this phrase came out quite nice. The card paper is from DCWV (Diecuts With A View) Pockets Full of Posies pack.  The neon green is a leftover scrap.  The flower was cut with the Tim Holtz Sizzix die, Tattered Florals with an orange brad for the center.  The butterfly was a print & cut from Samantha Walker. 


This note card utilizes digital paper from Lettering Delights Muted Designs Paper Pack with another PNC butterfly from Samantha Walker.


A thank you card using digital papers (cherries & polka dots) & alphabet from Lettering Delights Bowl Full of Cherries.  The bottom of the front was cut with decorative edge scissors & then the pink striped strip that is exposed was a paper scrap.  The front was also embossed with Juli's Garden (Cuttlebug). 


Money/check envelopes

This blog has moved to a new & improved location!  Please visit this page at the new location by clicking here.


I wanted to discreetly give a check to a friend.  But I also wanted it to be pretty!  So I enclosed the check in this cute money envelope made with the Silhouette Cameo.  

The digital paper was from LetteringDelights Circle Paper Pack.  The flower was made using a cut from Silhouette Online store & the leaves were from the Cuttlebug Daisy quilling kit die cut.


Here's the Silhouette cut for the flower:


This is another money envelope I'd made to give a tip to the dog groomer.   The digital paper is from Etsy.  


Tuesday, September 24, 2013

Using Cricut mats in the Silhouette Cameo

This blog has moved to a new & improved location!  Please visit this page at the new location by clicking here.


Although I've had my Cameo for a year now & the Cricut a bit longer, I'm still on a learning curve & often unsure about blade settings & such.  One issue I've had with the Cameo is that I've now ruined at least three new or nearly new mats because the Cameo cut right through them.  I've tried to continue to use them.  But often, when the mat is being rolled back & forth while cutting, the edges where the mat is cut through will cause the Cameo to jam or stick & you've now ruined the cut you're now making.  So in my experience, once a mat has been cut through, it's no longer useful.

The last time this happened, I got fed up (BRAND NEW MAT!) & Googled about using the thicker, Cricut mats in a Silhouette.  Sure enough, people are doing this.  It appears the Silhouette mats have a thinner top "margin".  So some people cut down their Cricut mats used in a Cameo.  So far, I've been able to get along by moving the paper up a bit.  In the photo below, when using the Cameo, I align the paper where the pink arrow is pointing instead of where the blue arrow is pointing.  Since this area is not sticky, you might have to use tape to tape the top edge down or you could treat it with some Zip two way glue, so that it is sticky.  (I guess that's why some people find it easier to just trim the top/bottom margins!)  To clarify, if you trim, do not trim the sides.  Only the top/bottom.

Additionally, Cricut mats are generally about half the price of the Silhouette mats!  

Say YAY!


Friday, September 20, 2013

Birthday card & matching tea bag!

This blog has moved to a new & improved location!  Please visit this page at the new location by clicking here.


I've a sister who is not particularly fond of pinks & purples.  So I selected a blueish/green digital print for the card & matching tea bag cover.  I added some washi tape that I'd bought at Walgreens on a whim - I just wanted to buy some & didn't find one I particularly liked, but I liked this the best of the bunch.  It matched beautifully!  Next came some pale yellow cuts from one of the new Anna Griffin Cuttlebug dies.  As you may imagine, her dies are very intricate & a bit of a pain, in my opinion.  It took quite a while to get the cut removed from the die & all the bits out.  When I got done, the middle row was rather boogered up.  So I decided to cut them apart & use the four good parts.  (I adhered the fourth one on top of the middle one with a pop dot to give it some dimension.)  I found some gems in my stash that again...matched beautifully!  This card was shaping up to be one of my favorites!  I then did a sentiment in Silhouette Studio Designer Edition, inked the edge with Tim Holtz antique linen & topped it off by spraying with some Perfect Pearls.  Although I'm sending it to my sister, I'm not happy with the way the sentiment came out.  So I'm going to make this card again & use a different way of adding the sentiment because I think this card has the potential to be a really beautiful card!

For the matching tea bag cover, I started with a tea bag graphic from the "Love You A Latte" collection at LetteringDelights.com.  I massaged it in Silhouette Studio Designer Edition by adding cut lines, replacing the graphic with the digital paper I used in the card & added a sentiment.  Even though it's kind of corny, I liked the sentiment of "For A Tea-rrific sister" & enclosed a bag of Ambiance Orange Jasmine green tea.

 The final step was making an envelope wrap for the address & return address.  When I first saw these, I thought they were weird.  But after I made my first one & put it on the envelope, it looked so nice that I was immediately sold on the idea.  I see a lot of envelope wrappers in my future!  I will post more information on them in a day or two, when I have more time.

I'm really loving the Simply Gorgeous font...most of the time.  The capital T looks a lot like a G.  So the sentiment on the front looks a lot like "Happy Birthday Go My Sister".  I guess it could be something worse! But as much as I love this font, I think I'm going to have to refrain from using it when I need a capital T.

  • digital paper - from the Daisies Paper pack at JessicaSprague.com
  • tea bag modified from a graphic in the "Love You A Latte" collection at LetteringDelights.com
  • Anna Griffin Cuttlebug die - Flower Layer
  • Scotch brand washi tape - Cracked 
  • font - Simply Gorgeous 
  • Xyron - used to adhere the three flowers on the front.  As intricate as this design is, I don't know how you'd adhere them any other way!


Friday, August 30, 2013

Birthday card for my niece

This blog has moved to a new & improved location!  Please visit this page at the new location by clicking here.


This is from last year & from the Cricut Art Nouveau cartridge.  I just love that cart!  Both the sentiment on the front & the image on the inside top are from it.  I cut a label for underneath the front sentiment & distressed the edges with the Zutter Distrezz-It-All & then inked the edges. 

The paper is from Mirabelle by The Paper Studio.  I love that paper pack, too.  Such nice papers with fall colors.